No edit summary Tag: rte-source |
No edit summary |
||
| (4 intermediate revisions by 4 users not shown) | |||
| Line 5: | Line 5: | ||
|zone=Moorlands |
|zone=Moorlands |
||
|type=Wave Battle |
|type=Wave Battle |
||
| − | |wave1= |
+ | |wave1=1x {{S|Brute|px=30}} |
| + | |wave2= |
||
| − | |wave2=Cave Shaman x1<br>Frost Hog x1 |
||
| + | 1x {{S|Cave Shaman|px=30}} |
||
| − | |wave3=Brawler (Boss) x1 |
||
| + | 1x {{S|Frost Hog|px=30}} |
||
| + | |wave3=1x Boss {{S|Brawler|px=30}} |
||
|prize={{Resources|Stone}} :3 |
|prize={{Resources|Stone}} :3 |
||
|next=[[Moorlands - 3]] |
|next=[[Moorlands - 3]] |
||
|previous=[[Moorlands - 1]] |
|previous=[[Moorlands - 1]] |
||
| − | |difficulty=Considerably hard |
+ | |difficulty=Considerably hard}} |
| + | {{EpicLevelIntro |
||
| − | }} |
||
| + | |no = second |
||
| − | '''Moorlands - 2''' is the second level of Moorlands. At wave 3 in this level, you will fight with the huge Brawler in the boss version. He just like Big Pirate and Big Sailor, only stronger and have 10% chance to stun you for a turn. |
||
| + | |area = Moorlands |
||
| − | ==Difficulty== |
||
| + | |type = Wave |
||
| − | '''<font color="purple">5.</font>''' Considerably hard |
||
| + | |main prize = 3 Stone |
||
| + | |new = One new pig is introduced here as a boss, Brawler. |
||
| + | He has Big Pirate's attack but stronger as it can stun any bird 10% of the time. He also requires just two turns to unleash the attack. |
||
| − | See [[Template:Difficulty System|Difficulty System]] for more informations. |
||
| + | |Hint Variable = Wildlings}} |
||
| ⚫ | |||
| + | |||
| + | ==Enemies== |
||
| + | {{Epic enemy section|wave or normal = wave}} |
||
| − | *If you choose [[Black Bird|Bomb]] in Berserk, the level will be easier for you. |
||
| − | ==Pigs== |
||
===Wave 1=== |
===Wave 1=== |
||
| + | {{Epic characters stats/Brute|348|HP = 1254}} |
||
| − | [[File:Brute.png|100px]] Brute |
||
| − | [[File:ABEpicHP (Transparent).png|20px]] {{Health|2113}} |
||
| − | |||
| − | <hr />[[File:PigAbilities1.png|60px|left]] |
||
| − | |||
| − | |||
| − | '''Smash!''' - Charge: 3 turns. Deals 459 damage.{{clear}} |
||
===Wave 2=== |
===Wave 2=== |
||
| + | {{Epic characters stats/Wilding Base/Cave Shaman|66|322|HP = 1287}} |
||
| − | [[File:Cave Shaman.png|100px]] Cave Shaman |
||
| + | {{Epic characters stats/Wilding Base/Frost Hog|246|49|HP = 1238}} |
||
| − | [[File:ABEpicHP (Transparent).png|20px]] {{Health|2168}} |
||
| − | |||
| − | <hr />[[File:PigAbilities4.png|60px|left]] |
||
| − | [[File:PigAbilities3.png|60px|left]] |
||
| − | [[File:PigAbilities6.png|60px|left]] |
||
| − | |||
| − | |||
| − | '''Force of Nature''' - Deals 87 damage to all enemies. Reduces received healing by 50% for 3 turns. |
||
| − | |||
| − | |||
| − | '''Healing Grunt''' - Charge: 2 turns. Heals target for 542 health. |
||
| − | |||
| − | |||
| − | |||
| − | '''Wilding''' - Passive: Gains bonus attack power while the Rage Chili fills up.{{clear}} |
||
| − | <hr> |
||
| − | [[File:Frost Hog.png|100px]] Frost Hog |
||
| − | |||
| − | [[File:ABEpicHP (Transparent).png|20px]] {{Health|2085}} |
||
| − | |||
| − | <hr />[[File:PigAbilities4.png|60px|left]] |
||
| − | [[File:PigAbilities6.png|60px|left]] |
||
| − | |||
| − | '''Shattering Blow''' - Charge: 3 turns. Deals 327 damage. Target also takes 65 damage per turn for the next 3 turns. |
||
| − | |||
| − | |||
| − | '''Wilding''' - Passive: Gains bonus attack power while the Rage Chili fills up.{{clear}} |
||
===Wave 3=== |
===Wave 3=== |
||
| + | {{Epic characters stats/Wilding Base/Brawler/2|218|HP = 3892}} |
||
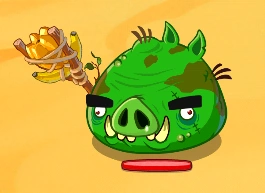
| − | [[File:Brawler.png|150px]] Brawler (Boss) |
||
| − | |||
| − | [[File:ABEpicHP (Transparent).png|20px]] {{Health|3892}} |
||
| − | |||
| − | <hr />[[File:PigAbilities1.png|60px|left]] |
||
| − | [[File:PigAbilities6.png|60px|left]] |
||
| − | |||
| − | '''Huge Haymaker''' - Charge: 2 turns. Deals 218 damage to all enemies. 10% chance to stun target for 1 turn. |
||
| − | |||
| − | |||
| − | '''Wilding''' - Passive: Gains bonus attack power while the Rage Chili fills up. |
||
| ⚫ | |||
==Strategy== |
==Strategy== |
||
| − | <font color="red">Warning:</font> On the first wave, don't use the Rage Chili to anyone. From wave 2, anytime, use the Rage Chili to [[White Bird|Matilda]] if the [[ |
+ | <font color="red">Warning:</font> On the first wave, don't use the Rage Chili to anyone. From wave 2, anytime, use the Rage Chili to [[White Bird|Matilda]] if the [[birds]]' healths are under 65% or for [[Red Bird|Red]] if otherwise. |
Choose [[Red Bird|Red]] in Samurai, [[White Bird|Matilda]] in Druid and [[Black Bird|Bomb]] in Cannoneer (if you have Berserk, use it!). In every waves, attack every turn with [[Red Bird|Red]] and [[Black Bird|Bomb]], then, heal with [[White Bird|Matilda]] if the birds' health is not full, otherwise, attack with her. When, the Rage Chili is full, do as what we said at the "<font color="red">Warning</font>". Then, you need to activate [[Red Bird|Red]]'s secondary skill when Brute, Frost Hog or Brawler is about to attack! Repeat this over and over until you win the entire battle or lose the entire battle. |
Choose [[Red Bird|Red]] in Samurai, [[White Bird|Matilda]] in Druid and [[Black Bird|Bomb]] in Cannoneer (if you have Berserk, use it!). In every waves, attack every turn with [[Red Bird|Red]] and [[Black Bird|Bomb]], then, heal with [[White Bird|Matilda]] if the birds' health is not full, otherwise, attack with her. When, the Rage Chili is full, do as what we said at the "<font color="red">Warning</font>". Then, you need to activate [[Red Bird|Red]]'s secondary skill when Brute, Frost Hog or Brawler is about to attack! Repeat this over and over until you win the entire battle or lose the entire battle. |
||
| + | |||
{{clear}} |
{{clear}} |
||
Latest revision as of 07:24, 12 September 2018
Moorlands - 2 is the second level of Moorlands in Angry Birds Epic. It is a Wave stage. When this level is finished, the player may spin for 3 Stone. One new pig is introduced here as a boss, Brawler.
He has Big Pirate's attack but stronger as it can stun any bird 10% of the time. He also requires just two turns to unleash the attack.
Battle Hint
Wildlings (Gain bonus attack power while the Rage Chili fills up.)
These native pigs have Wilding to deal up to 50% more damage (1% bonus attack per 2% Rage Chili filled) depending on your filled rage Chili.
Hint: Keep the attack bonus of the Wilding ability low by spending your Rage ability right before Wildings use a big attack.
Enemies
Unless stated otherwise, there is only 1 of each type of enemy. Each enemy's stats are shown below per wave.
Wave 1

Wave 2


Wave 3

Strategy
Warning: On the first wave, don't use the Rage Chili to anyone. From wave 2, anytime, use the Rage Chili to Matilda if the birds' healths are under 65% or for Red if otherwise.
Choose Red in Samurai, Matilda in Druid and Bomb in Cannoneer (if you have Berserk, use it!). In every waves, attack every turn with Red and Bomb, then, heal with Matilda if the birds' health is not full, otherwise, attack with her. When, the Rage Chili is full, do as what we said at the "Warning". Then, you need to activate Red's secondary skill when Brute, Frost Hog or Brawler is about to attack! Repeat this over and over until you win the entire battle or lose the entire battle.
Gallery
")
")
")
Walkthroughs

| |||||||||||||||||||||||||||||||||||||||||||||||||||||||||||||||||||||||||||||||||||||||||||||||||||||||||||||||||||||||||||||||||||||||||||||||||||||||||||||||||||||||||||||||||||||||||